Attack
Table of Contents
This section covers our setup, how we call the throw and any movements in the lineout, and then how we play the ball away from the lineout.
Formations NEW
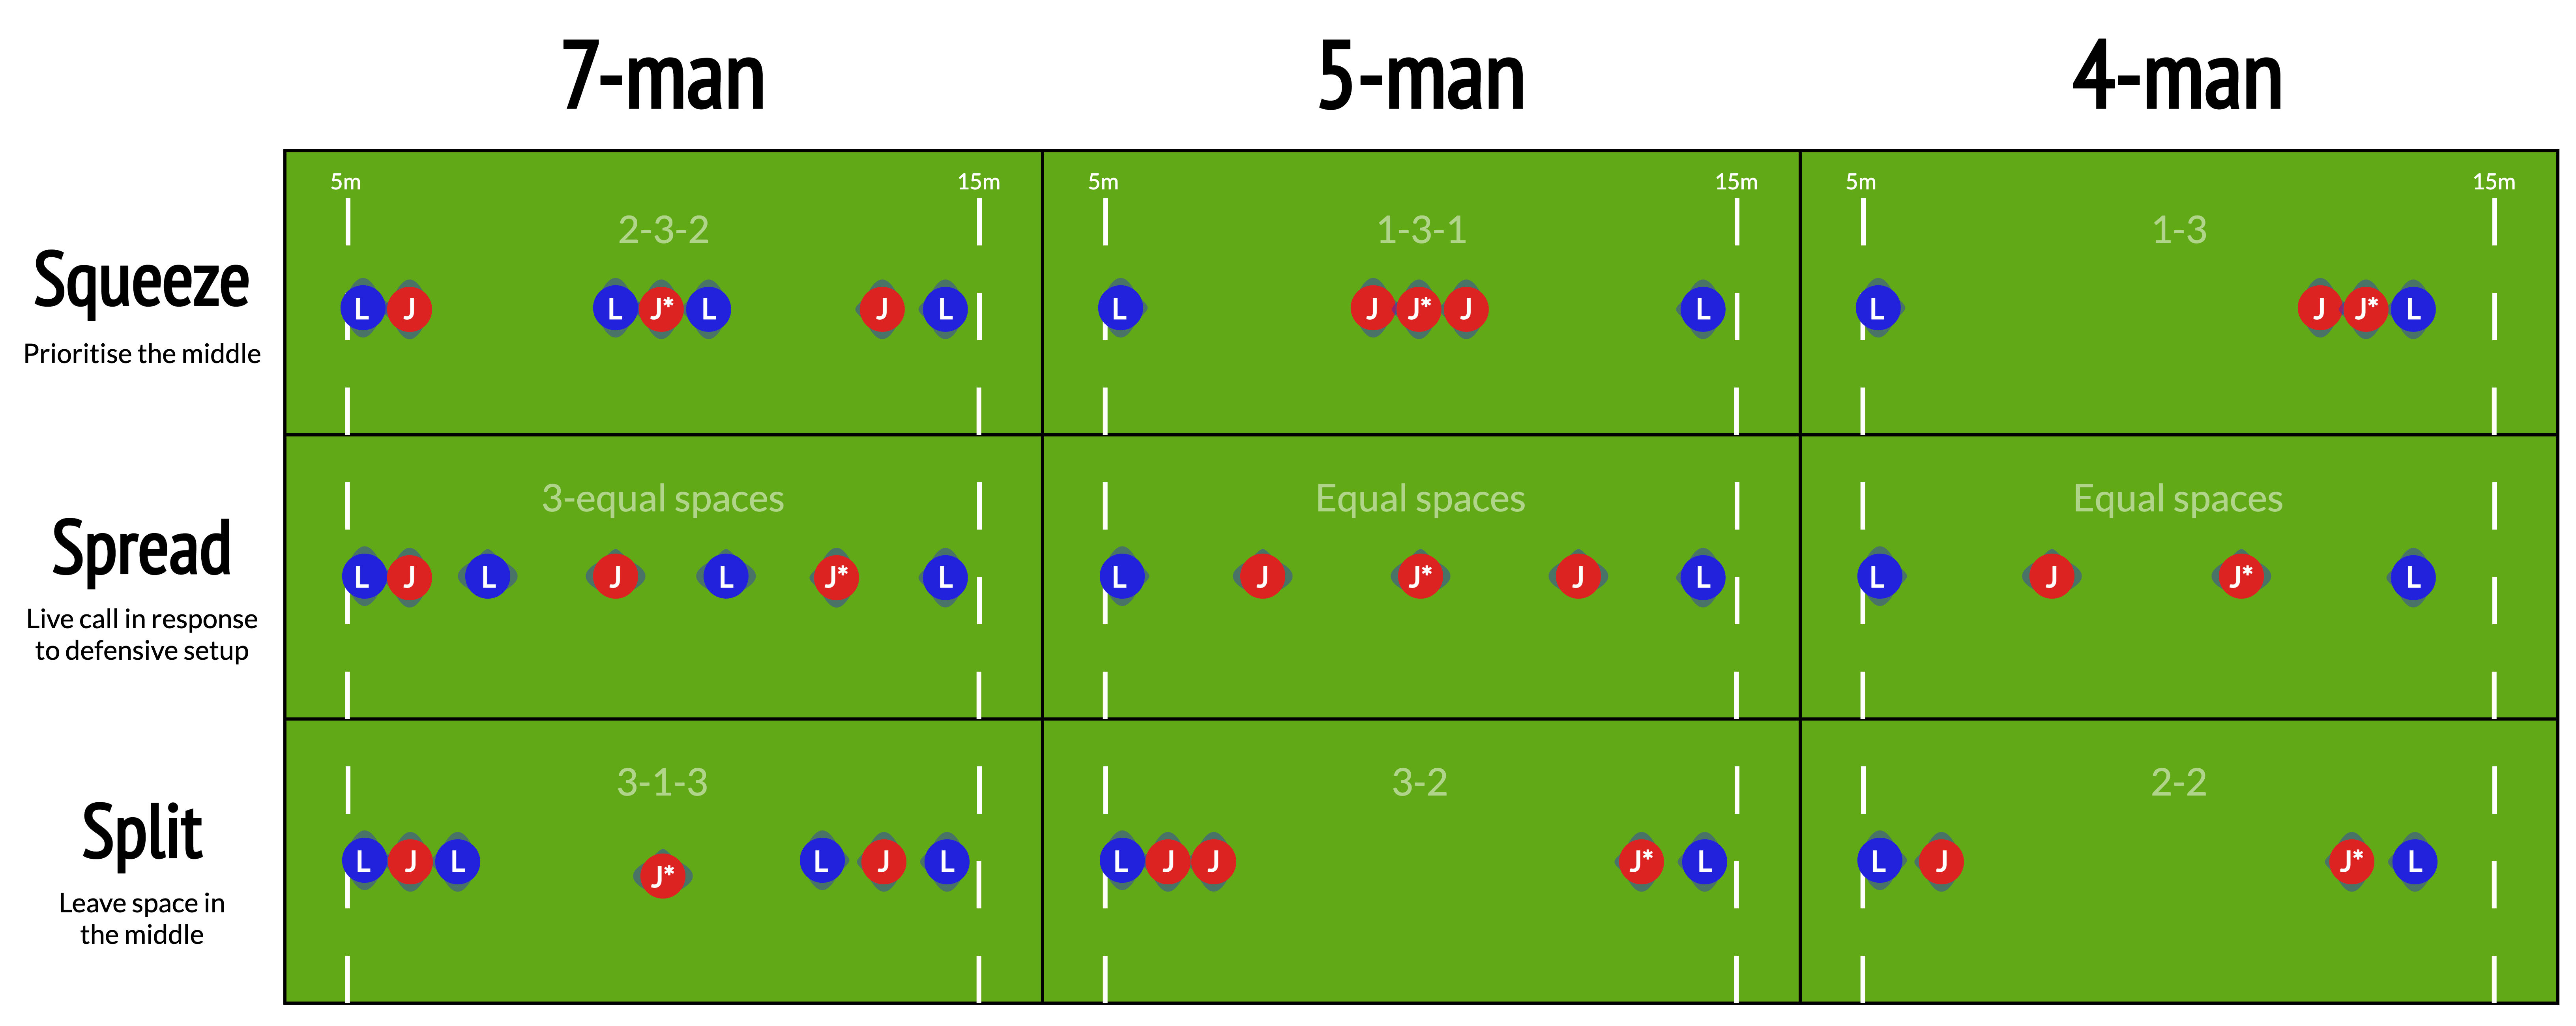
We run a 5-man lineout by default, but also 7-man and 4-man lineout variations. Each of these can be set up with many different formations (e.g. 1-3-2-1 or 1-1-3) so we need to keep things simple, but flexible.
| Squeeze | A pre-set middle pod1 is ready for a quick “Bang” or to draw in the defence before moving. Default setup |
| Spread | Evenly spaced, keeping the defence guessing so we can attack weak spots or win with speed. |
| Split | Pods at front and back create space in the middle for movement or quick delivery. |
Calls NEW
We divide the lineout into 3 zones (1, 2, 3), each with a jumper, or 0 for the very front with no jump (i.e. “Matlow”).
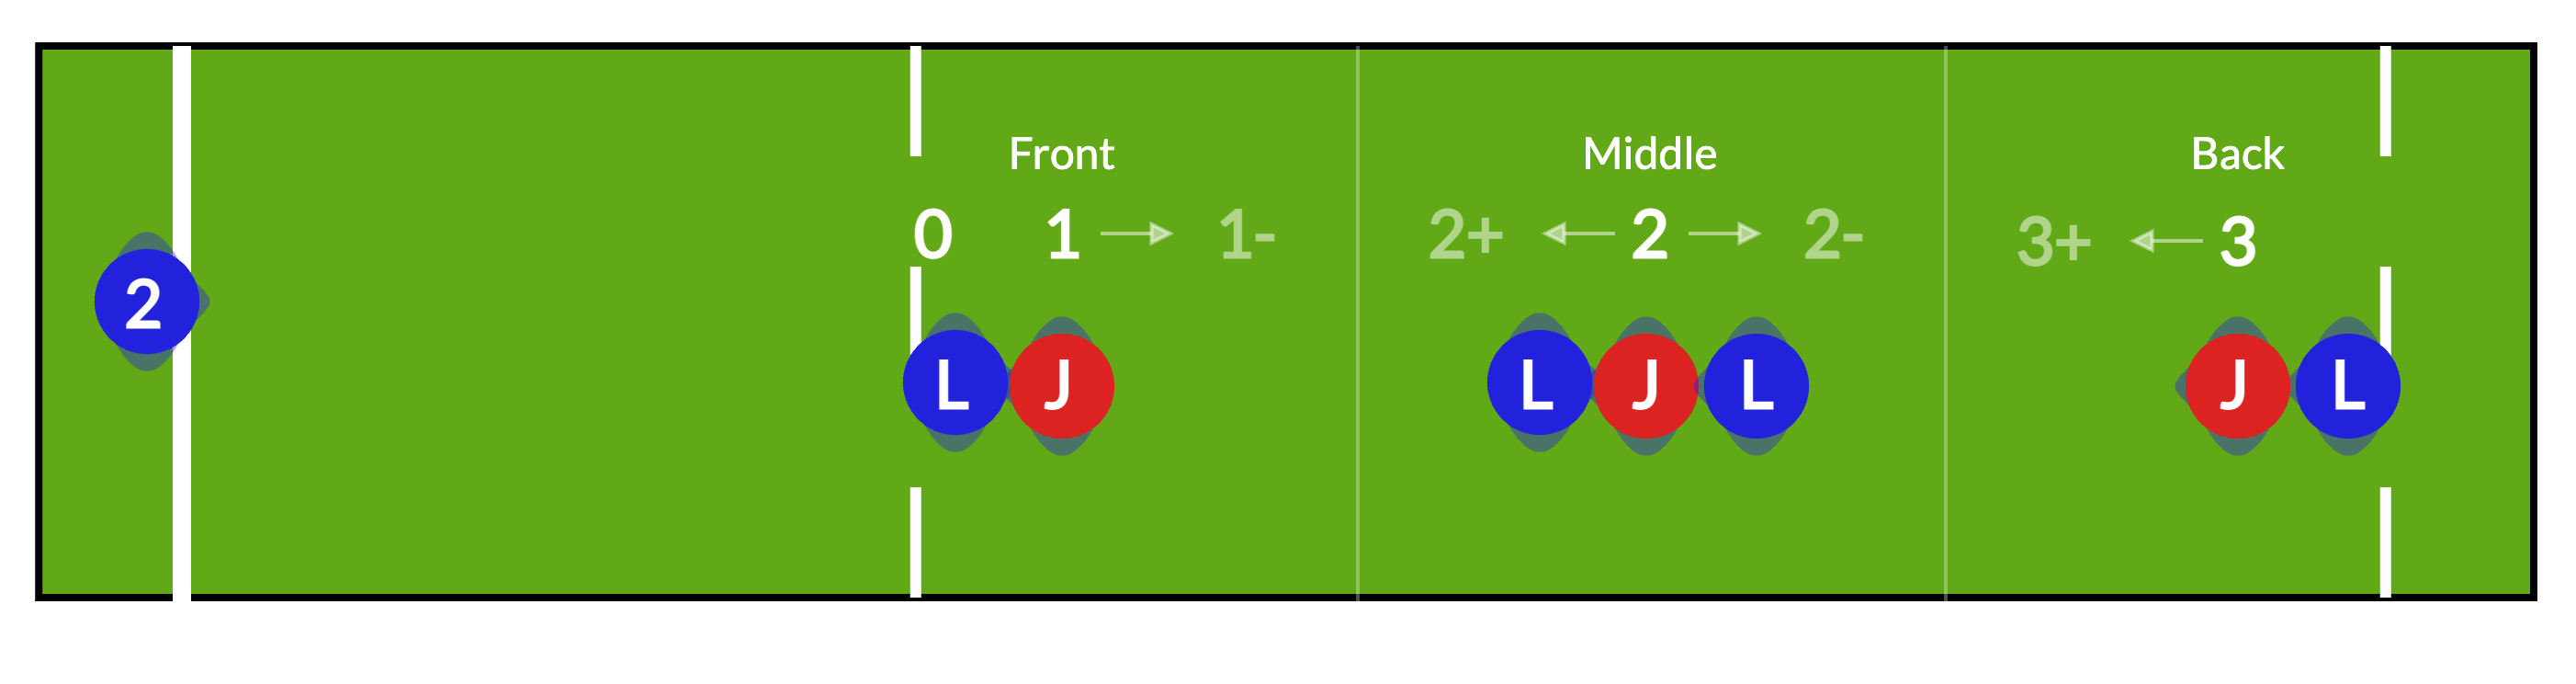
For more complex movements, we can chain together multiple calls – e.g. 1 2 (dummy jump at 1, before jumping at 2). The specific movements will depend on the initial formation and can be workshopped in training. Once the basic calls are mastered, we can add further modifiers to include more complex movements.
Calling process

In a huddle, the caller gives the formation, call, and play. Once in position, they trigger the move with “Set”.
Every lineout includes a “Bang” option — a quick throw to a pre-set pod (middle or back), if needed.
If “Bang” isn’t viable, the caller can say “Cancel”, give a new call and then proceed as normal.
Plays

The final part of the lineout is how we play the ball once it has been secured. Broadly, this is split into two categories: Hot (ball to the backs) and Cold (ball stays in the forwards).
Hot
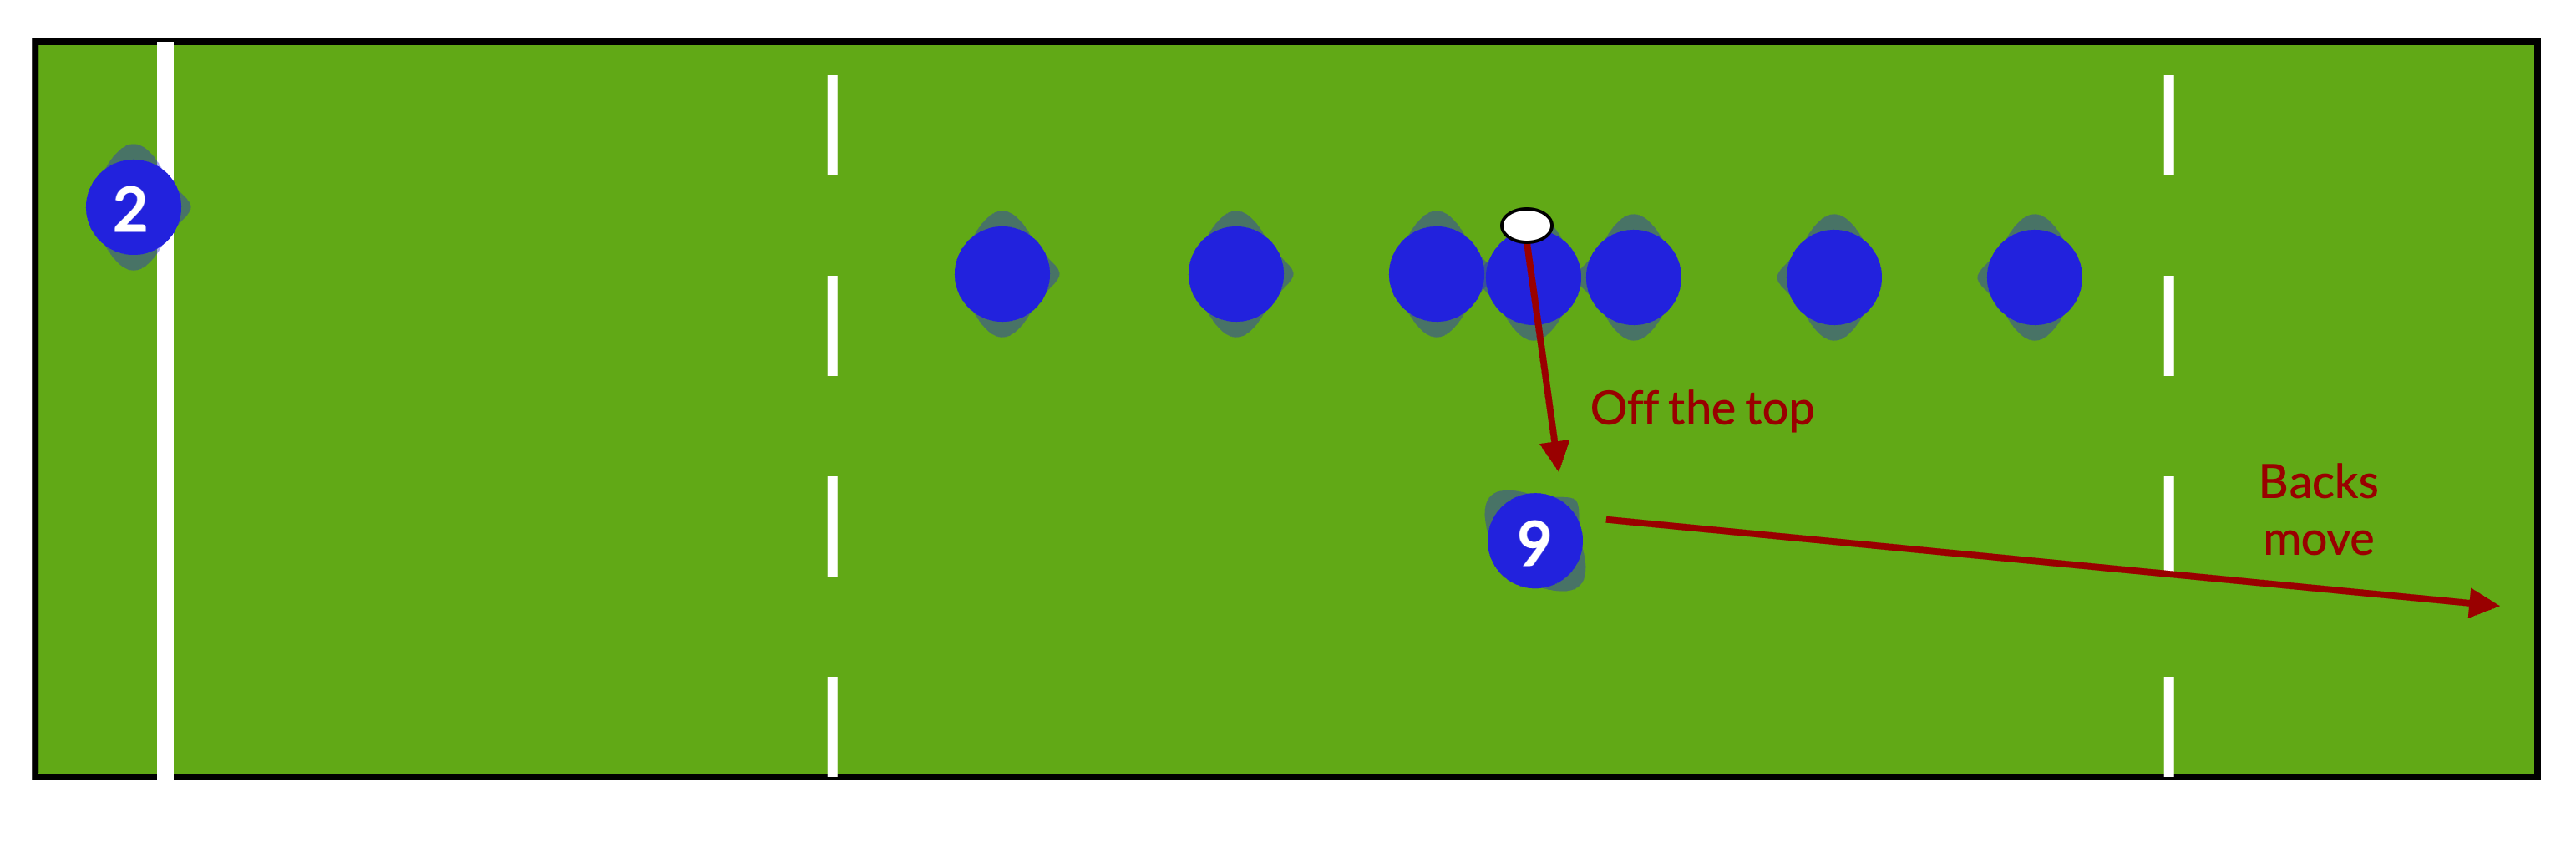
The jumper passes directly to the scrum half, who can play the ball as determined by the backs (e.g. a Backs Move or King or Queen off a short lineout).
Cold

The standard option is for the jumper to be brought down to ground, and the forwards to set up a maul on that spot.
The jumper can also pass the ball down to another forward in the lineout to shift the initial point of contact for the maul (Transfer).
Maul setup
To ensure cohesion as a unit, we set up as follows, aiming to driving through and around the back lifter:
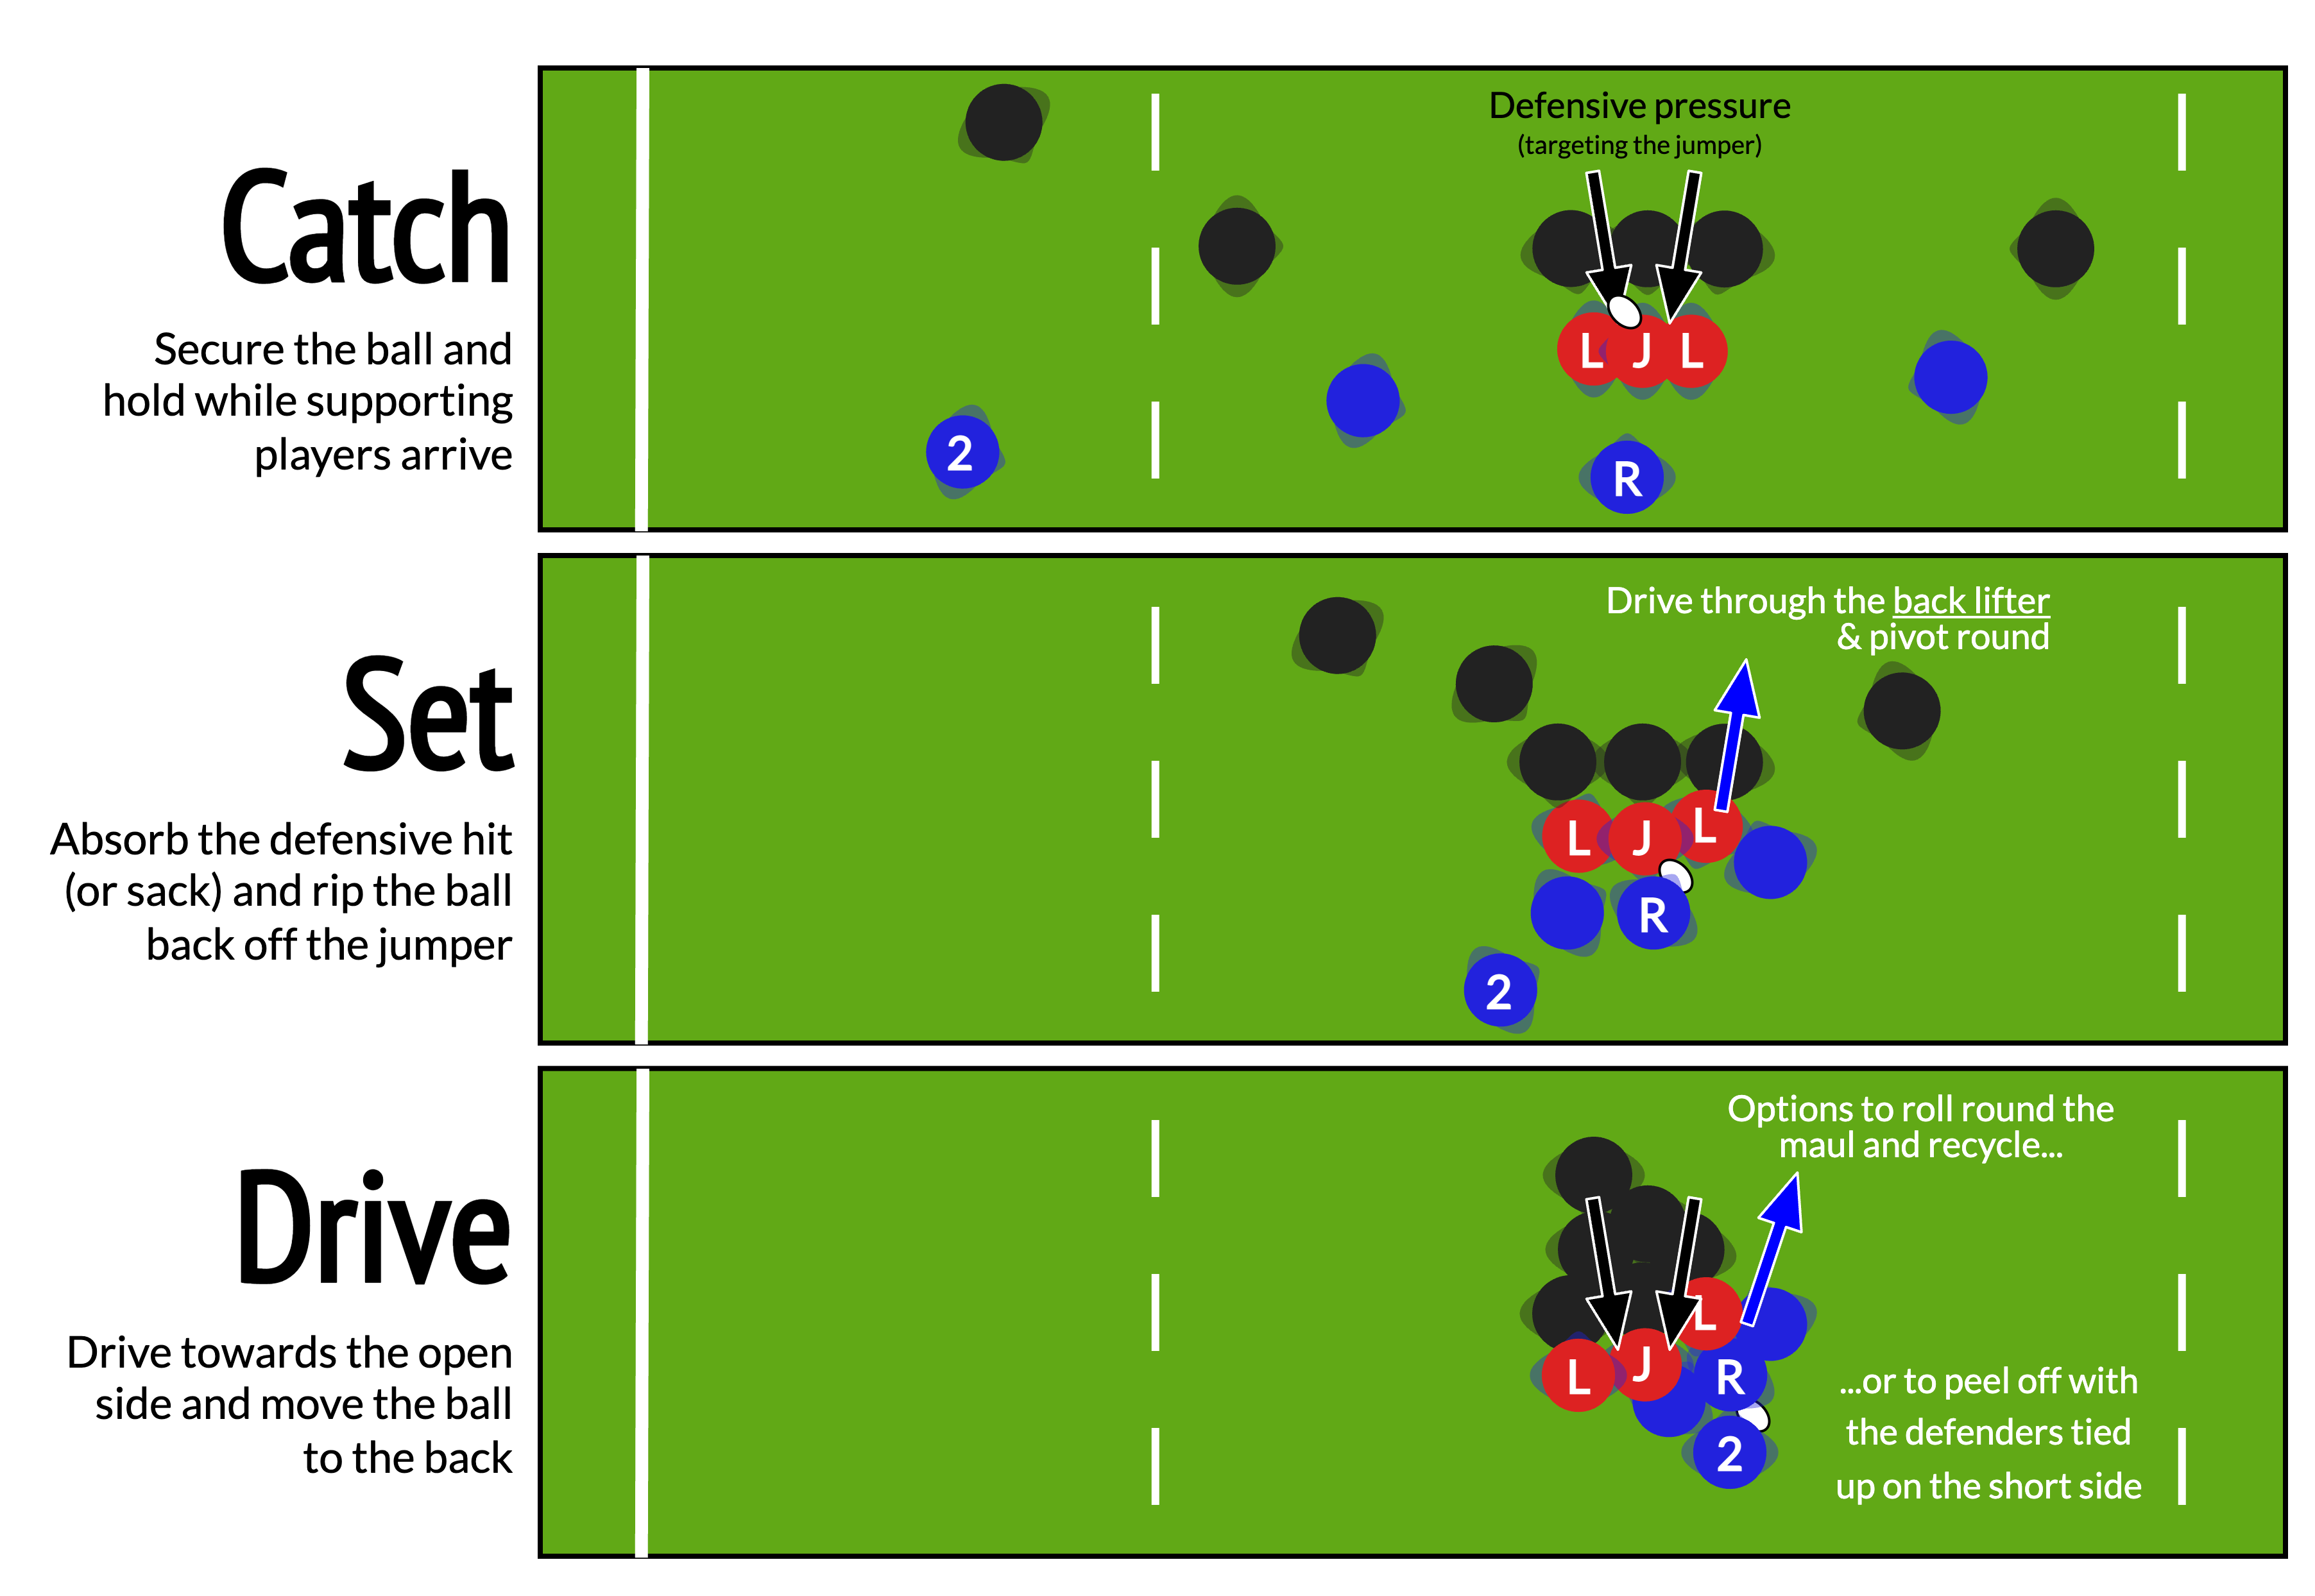
Note
The forward at the back of the maul acts effectively as a number 8 in a scrum (see Plays off scrum) so the scrum half may call a move.
These moves are not part of the lineout call - they will be called live by the scrum half.
Flyby
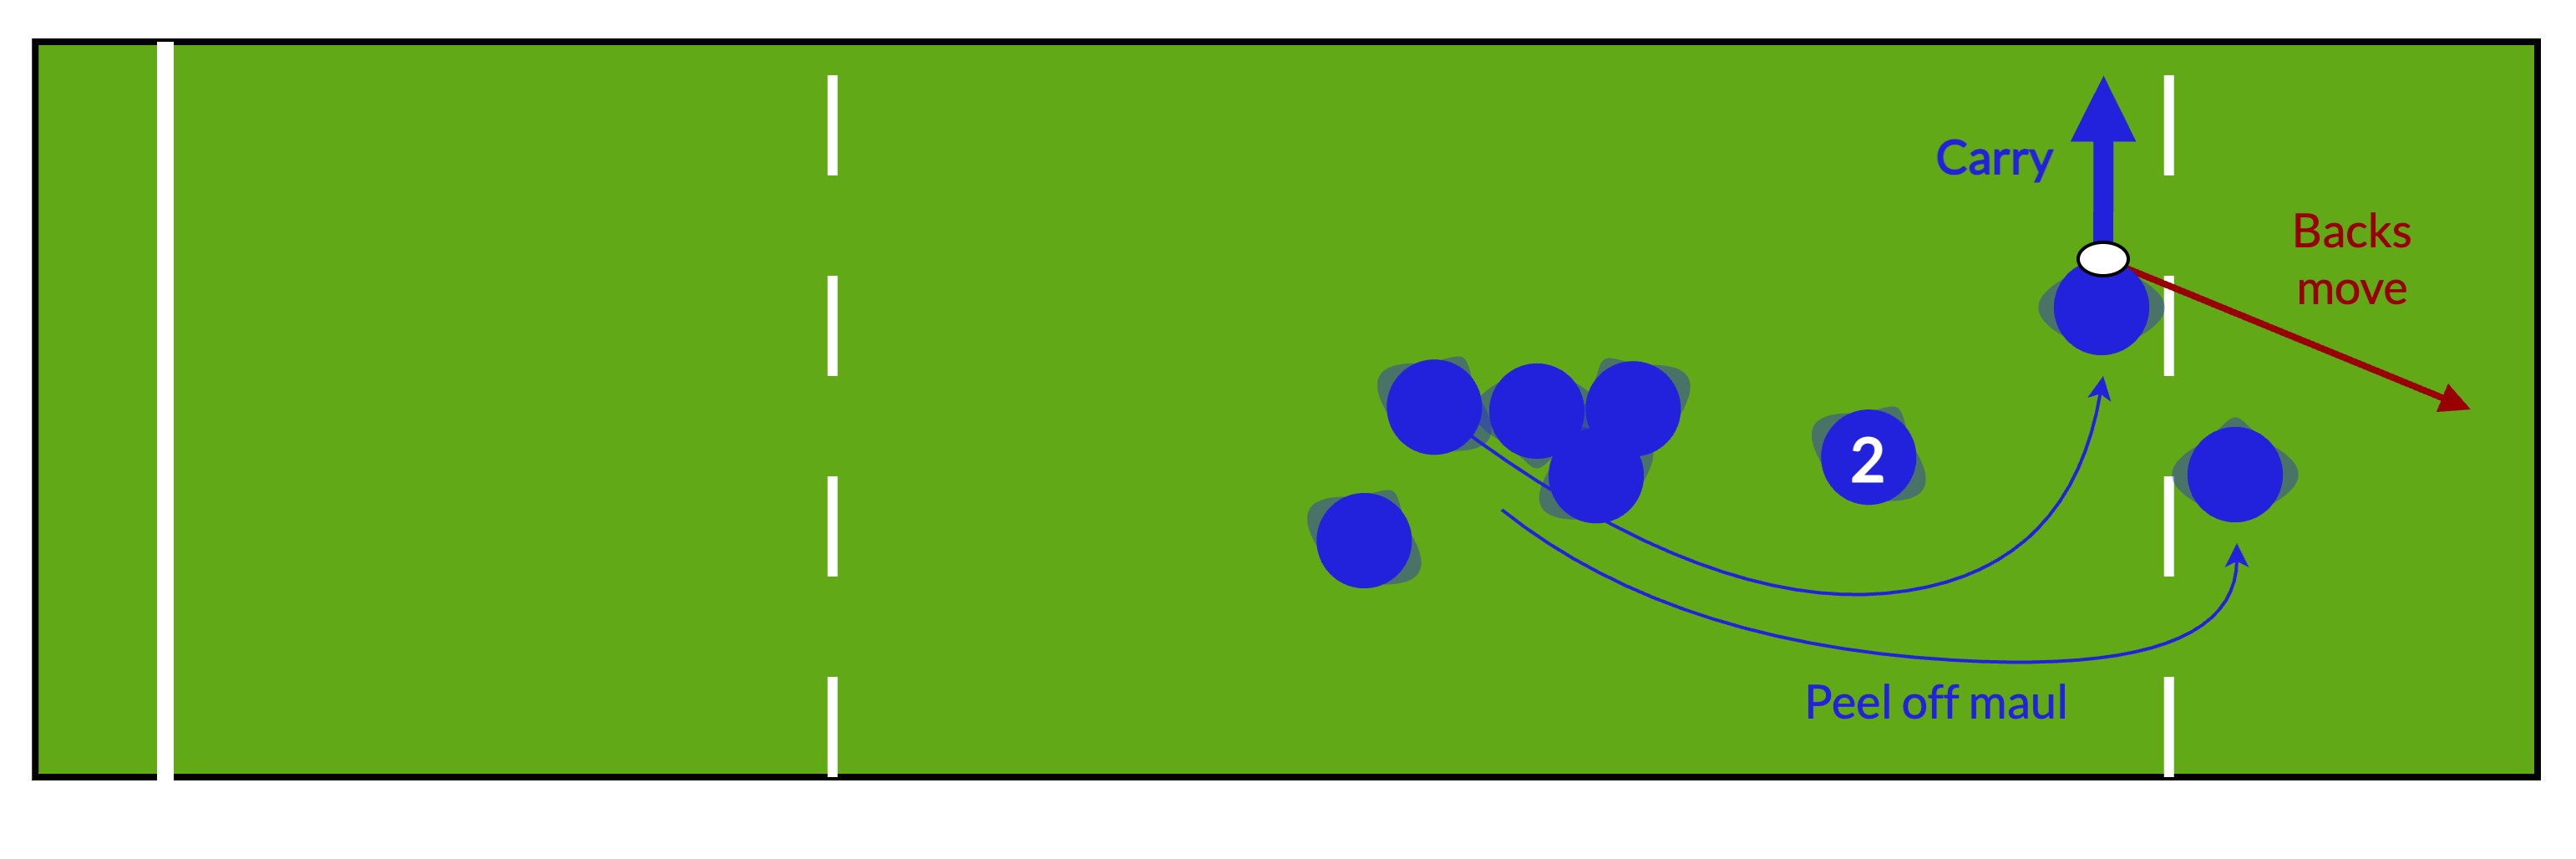
With the same setup as a Cold ball, the jumper can bring the ball to ground, but for another forward to peel off and carry (see Plays off scrum).
For simplicity, the ball carrier should expect to pass to the 9 (i.e. ♣️ Clubs or ♦️ Diamonds), but other forwards in the lineout should follow the play and be ready to support the ball carrier.
Note
Flyby also involves the backs, so only run it when the backs have asked for it (or been told to expect it)
-
Or back pod in the case of the 4-man version. ↩